Pic16F877A Interface Lm35 Temp Sensor - Mikroc (Collection)
Published 11/2024
MP4 | Video: h264, 1920x1080 | Audio: AAC, 44.1 KHz
Language: English | Size: 2.35 GB | Duration: 2h 12m
Published 11/2024
MP4 | Video: h264, 1920x1080 | Audio: AAC, 44.1 KHz
Language: English | Size: 2.35 GB | Duration: 2h 12m
LM35 temperature sensor based projects with PIC16F877A microcontroller using MikroC for PIC compiler.
What you'll learn
You will learn using ADC module of PIC to interface LM35 temperature sensor.
You will learn how to sample LM35 data to turn it into Celsius and Farehenheight scale using MikroC for PIC compiler.
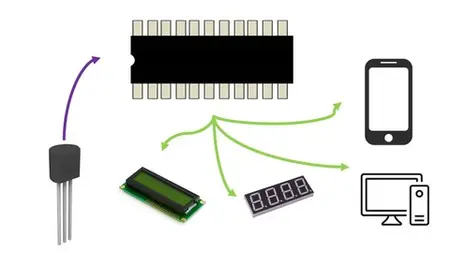
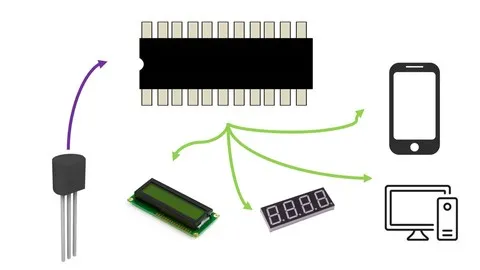
You will learn how to use various output device with PIC15F877A to display your temperature data like, 7 segment dsiplays, LM016 LCD and bluetooth module HC-05.
This course will help you to understand interface of LM35 temp sensor with PIC16F877A Microcontroller using MikroC for PIC compiler.
Requirements
Beginner level and intrest in microcontrollers and electronics.
Description
This course will teach you how you can interface an LM35 temperature sensor with a PIC16F877A microcontroller using MikroC for PIC compiler. And then you can use various devices to display the output result. Once you inteface the LM35 with PIC you will notice that you need the ADC module of PIC to interface, then once dealth with that you will notice we need to sample that data using formula in programming to turn it into useful units like Celsius or Farenheit. After that we need to display the output somewhere for that this course covers 4 digit senven display, LM016 16X2 LCD, USB to TTL device and a HC-05 bluetooth module. Moreover, the course have an intial part which gives you an intro to PIC16F877A and also teaches you how to download and install MikroC and PICKIT programmer tool. After going through the course you will be able to make practical temprature measurement systems using PIC16F877A microcontroller and LM35/36 sensor. The great thing about using these tools is that the coding and interface is exactly same for all the PIC microcontroller. Like you have a one PICKIT 3 then you can use the same tools for more than 500 types of PIC10,PIC12,PIC16 and PIC18s found in the market. Because coding technique and syntax for all microcontroller is exactly the same only differnt is the PIN layout and PIN declaration commands because different controller will have differen pin settings. For PICKIT 3 aswell you need only 5 or 6 wires for programming only differnce is that on other microcntroller they will be at differnt positions.So this course will make you an expert in making practical commerical temperature measurement projects using PIC16F877A microcontroller and the LM35 temperature sensor.
Overview
Section 1: Introduction to PIC16F877A microcontroller.
Lecture 1 Introduction to PIC16F877A microcontroller.
Lecture 2 Get to know Pins and Ports of PIC16F877A microcontroller and some basic specs.
Lecture 3 Setting up PIC16F877A microcontroller for the first run.
Section 2: Downloading and Installing MikroC for PIC.
Lecture 4 Downloading and Installing MikroC for PIC latest and final version.
Section 3: PICKIT programmer tool download and install.
Lecture 5 Downloading and installing PICKIT 3 programmer tool.
Section 4: LM35 temperature sensor based projects using PIC16F877A Collection.
Lecture 6 LM35 interface with PIC16F877A and output on LM016 LCD in C and F units.
Lecture 7 LM35 with PIC16F877A and output on 4 digit 7 segment display in Celsius.
Lecture 8 Wireless LM35 based temp measurement system using PIC16F877A and HC-05 module.
Lecture 9 LM35 interface PIC16F877A and send output to a PC/Laptop using USB to TTL device
Beginners with having intrest in learning microcontroller programming along with making hardware based projects.


