

Scene Creation With Blender And Substance Painter
Scene Creation With Blender And Substance Painter
Last updated 7/2020
MP4 | Video: h264, 1280x720 | Audio: AAC, 44.1 KHz
Language: English | Size: 19.86 GB | Duration: 16h 30m
Last updated 7/2020
MP4 | Video: h264, 1280x720 | Audio: AAC, 44.1 KHz
Language: English | Size: 19.86 GB | Duration: 16h 30m
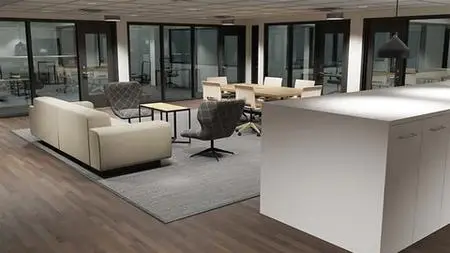
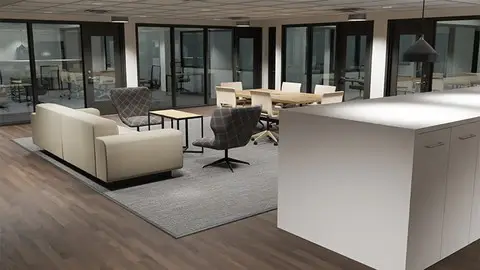
Use Blender and Substance Painter to create an interior scene for animation, games, or architectural visualization.
What you'll learn
Blender's modeling tools and modifiers
UV map 3D objects in Blender
Prepare 3D models for export to Substance Painter
Create realistic PBR textures for 3D models in Substance Painter
Create an Export Template in Substance Painter to be used for Blender
Apply PBR textures in Blender
Add lights to a scene in Blender
Render a scene using both the Cycles and Eevee render engines in Blender
Requirements
This is an introductory course, but it assumes a basic familiarity with Blender and Substance Painter
Description
Would you like create realistic environments for animation, architectural visualization, or games? Then check out "Scene Creation with Blender and Substance Painter."In this course you will learn how to:Use Blender's modeling tools and modifiersUV map 3D objects in BlenderPrepare 3D models for export to Substance PainterCreate realistic PBR textures for 3D models in Substance PainterCreate an Export Template in Substance Painter to be used for BlenderApply PBR textures in BlenderAdd lights to a scene in BlenderRender a scene using both the Cycles and Eevee render engines in BlenderWe will go over Blender’s modeling toolset and use blueprints to build up the walls, doors, and windows of the scene. We also will use reference images to help us model each piece of furniture in the various rooms.You'll learn how to UV map 3D objects and how to prepare each one for export to Substance Painter as an FBX file. In Substance Painter we’ll create realistic PBR textures for our models, and you’ll learn how best to set-up those textures for use in Blender.After we add the textures in Blender, we will begin working on the lighting. We’ll add spot lights and area lights to the scene and we will render the scene out using both Blender’s Cycles render engine, and the new Eevee render engine. You’ll see the differences and benefits of both.All the project files are available for download, as well as all the reference images.Start creating your own 3D environments in Blender. Get "Scene Creation with Blender and Substance Painter" today!
Overview
Section 1: Introduction
Lecture 1 Introduction
Lecture 2 Importing a Reference Image
Lecture 3 Setting the Proper Scale
Section 2: Modeling the Rooms
Lecture 4 Beginning the Walls
Lecture 5 Creating the Interior Walls
Lecture 6 Tricks for Aligning the Walls
Lecture 7 Continuing with the Walls
Lecture 8 Using the Boolean Modifier
Lecture 9 Creating the Openings for the Doors
Lecture 10 Finishing the Window Openings
Lecture 11 Beginning the Window Frames
Lecture 12 Finishing the Window Frames
Lecture 13 Starting the Office Frames
Lecture 14 Finishing the Office Frames
Lecture 15 Creating the Door Frame
Lecture 16 Inserting the Door Frames
Lecture 17 Beginning the Doors
Lecture 18 Creating the Door Handle
Lecture 19 Creating the Door Lock
Lecture 20 Placing Doors and Organizing the Scene
Lecture 21 Creating the Closet Doors
Lecture 22 Finishing the Closet Doors
Lecture 23 Beginning the Kitchen Island
Lecture 24 Modeling the Cabinet Handles
Lecture 25 Beginning the Kitchen Counter
Lecture 26 Adding the Kitchen Cabinets and Drawers
Lecture 27 Creating the Kitchen Handles
Lecture 28 Fixing Smoothing Errors
Lecture 29 Organizing the Scene
Section 3: Creating the Furniture
Lecture 30 Modeling the End Tables
Lecture 31 Modeling the Sofa
Lecture 32 Beginning the Stools
Lecture 33 Continuing the Stools
Lecture 34 Finishing the Stools
Lecture 35 Modeling the First Chair
Lecture 36 Continuing the Chair
Lecture 37 More Work on the Chair
Lecture 38 Finishing the Chair
Lecture 39 Beginning the Table
Lecture 40 Finishing the Table and Rug
Lecture 41 Beginning the Second Chair
Lecture 42 Continuing the Chair
Lecture 43 Modeling the Chair Arms
Lecture 44 Creating the Legs of the Chair
Lecture 45 Working on the Wheels of the Chair
Lecture 46 Finishing the Second Chair
Lecture 47 Batch Renaming Multiple Objects
Lecture 48 Beginning the Third Chair
Lecture 49 Creating the Arm Rests and Back
Lecture 50 Modeling the Back Frame and Legs
Lecture 51 Adjusting Proportions of the Chair
Lecture 52 Finishing the Third Chair
Lecture 53 Populating the Offices
Lecture 54 Beginning the Refrigerator
Lecture 55 Finishing the Refrigerator
Lecture 56 Extrude Along a Path
Lecture 57 Finishing the Faucet
Lecture 58 Beginning the Coffee Machine
Lecture 59 Finishing the Coffee Machine
Lecture 60 Creating the Drop Ceilings
Lecture 61 Modeling the Kitchen Hanging Lights
Lecture 62 Creating the Large Hanging Lights
Lecture 63 Modeling the Air Vents
Lecture 64 Placing the Canister Lights
Lecture 65 Modeling the Conference Room Glass
Lecture 66 Adding the Glass for the Offices
Section 4: UV Mapping the Scene
Lecture 67 UV Mapping the Office Desks
Lecture 68 UV Mapping the Stools
Lecture 69 UV Mapping the Conference Room Chairs
Lecture 70 Creating the UVs for the End Tables
Lecture 71 Working on the Chair and Sofa
Lecture 72 Chair, Lights, and Drop Ceiling
Lecture 73 Kitchen Lights and Cannister Lights
Lecture 74 UV Mapping the Kitchen
Lecture 75 Finishing the UV Mapping
Section 5: Texturing with Substance Painter
Lecture 76 Exporting to Substance Painter
Lecture 77 Importing in Substance Painter
Lecture 78 Exporting Textures Out of Substance Painter
Lecture 79 Finishing the End Table and Beginning the Chair
Lecture 80 Texturing the Chair
Lecture 81 Preparing the Coffee Machine for Export
Lecture 82 Texturing the Coffee Machine
Lecture 83 Adding an Image Texture in Substance Painter
Lecture 84 Creating the Vertex Colors for Hanging Lights
Lecture 85 Creating and Applying an Emissive Texture
Lecture 86 A Brief Discussion of the Direction of Normals
Lecture 87 Using an Opacity Channel in Substance Painter
Lecture 88 Using an Alpha Channel in Blender
Lecture 89 Adjusting Mask Tolerances in Substance Painter
Lecture 90 Sampling Colors in Substance Painter
Lecture 91 Exporting Multiple Objects as a Single FBX
Lecture 92 Texturing the Kitchen Counter and Appliances
Lecture 93 Exporting Textures for Multiple Objects
Lecture 94 Applying Textures to the Kitchen_Objects
Lecture 95 Selection Tricks When Applying Vertex Colors
Lecture 96 Copy and Paste Layers in Substance Painter
Lecture 97 Using the Node Wrangler Add-on in Blender
Lecture 98 Preparing the Floors for Texturing
Lecture 99 Texturing the Floors
Section 6: Lighting and Rendering the Scene
Lecture 100 Adding Lights to the Scene
Lecture 101 Adding a Glass Material
Lecture 102 Rendering with Cycles
Lecture 103 Using the Denoise Node
Lecture 104 Rendering with Eevee
Lecture 105 Conclusion
Section 7: Bonus Lectures
Lecture 106 Bonus Lecture: Reflection Cubmaps in Eevee
Lecture 107 Bonus Lecture: Auto UV Unwrap in Substance Painter
Beginner 3D artists who would like to create and texture 3D environments